10 WebFlux 集成测试及部署
前言
在日常工作中,免不了自测 UT,因为覆盖率不达标,是不允许提交测试,那怎么进行 WebFlux 项目的测试呢。@WebFluxTest 是 WebFlux 测试的重要注解。
结构
回到这个工程中,使用 springboot-webflux-3-mongodb 工程,工程如图:
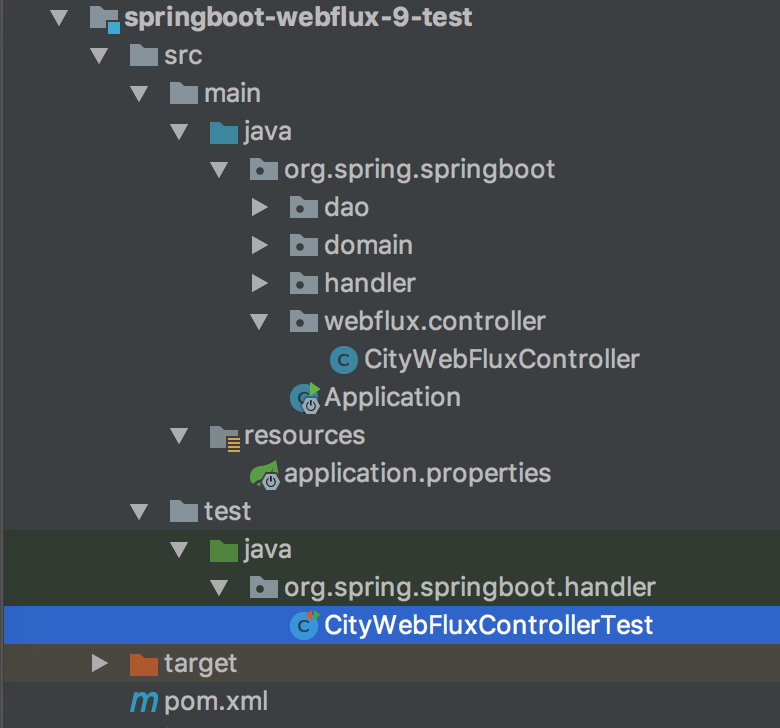
目录核心如下:
- pom.xml 添加 Test 相关依赖;
- test / CityWebFluxControllerTest WebFlux API 测试类;
POM 依赖
pom.xml 添加对应的测试依赖:
CityWebFluxControllerTest WebFlux API 测试类
@WebFluxTest 用于测试 Spring WebFlux 控制器,支持自动配置 Spring WebFlux 基础组件,可以限制扫描范围等。
代码如下: @RunWith(SpringRunner.class) @SpringBootTest(webEnvironment = SpringBootTest.WebEnvironment.RANDOM_PORT) public class CityWebFluxControllerTest { @Autowired private WebTestClient webClient; private static Map<String, City> cityMap = new HashMap<>(); @BeforeClass public static void setup() throws Exception { City wl = new City(); wl.setId(1L); wl.setProvinceId(2L); wl.setCityName(“WL”); wl.setDescription(“WL IS GOOD”); cityMap.put(“WL”, wl); } @Test public void testSave() throws Exception { City expectCity = webClient.post().uri(“/city”) .contentType(MediaType.APPLICATION_JSON) .body(BodyInserters.fromObject(cityMap.get(“WL”))) .exchange() .expectStatus().isOk() .expectBody(City.class).returnResult().getResponseBody(); Assert.assertNotNull(expectCity); Assert.assertEquals(expectCity.getId(), cityMap.get(“WL”).getId()); Assert.assertEquals(expectCity.getCityName(), cityMap.get(“WL”).getCityName()); } }
代码详解:
- @WebFluxTest 注入了 WebTestClient 对象,用于测试 WebFlux 控制器,好处是快速,并无需启动完整 HTTP 容器。
- WebTestClient.post() 方法构造了 POST 测试请求,并使用 uri 指定路由。
- expectStatus() 用于验证返回状态是否为 ok(),即 200 返回码。
- expectBody(City.class) 用于验证返回对象体是为 City 对象,并利用 returnResult 获取对象。
- Assert 是以前我们常用的断言方法验证测试结果。
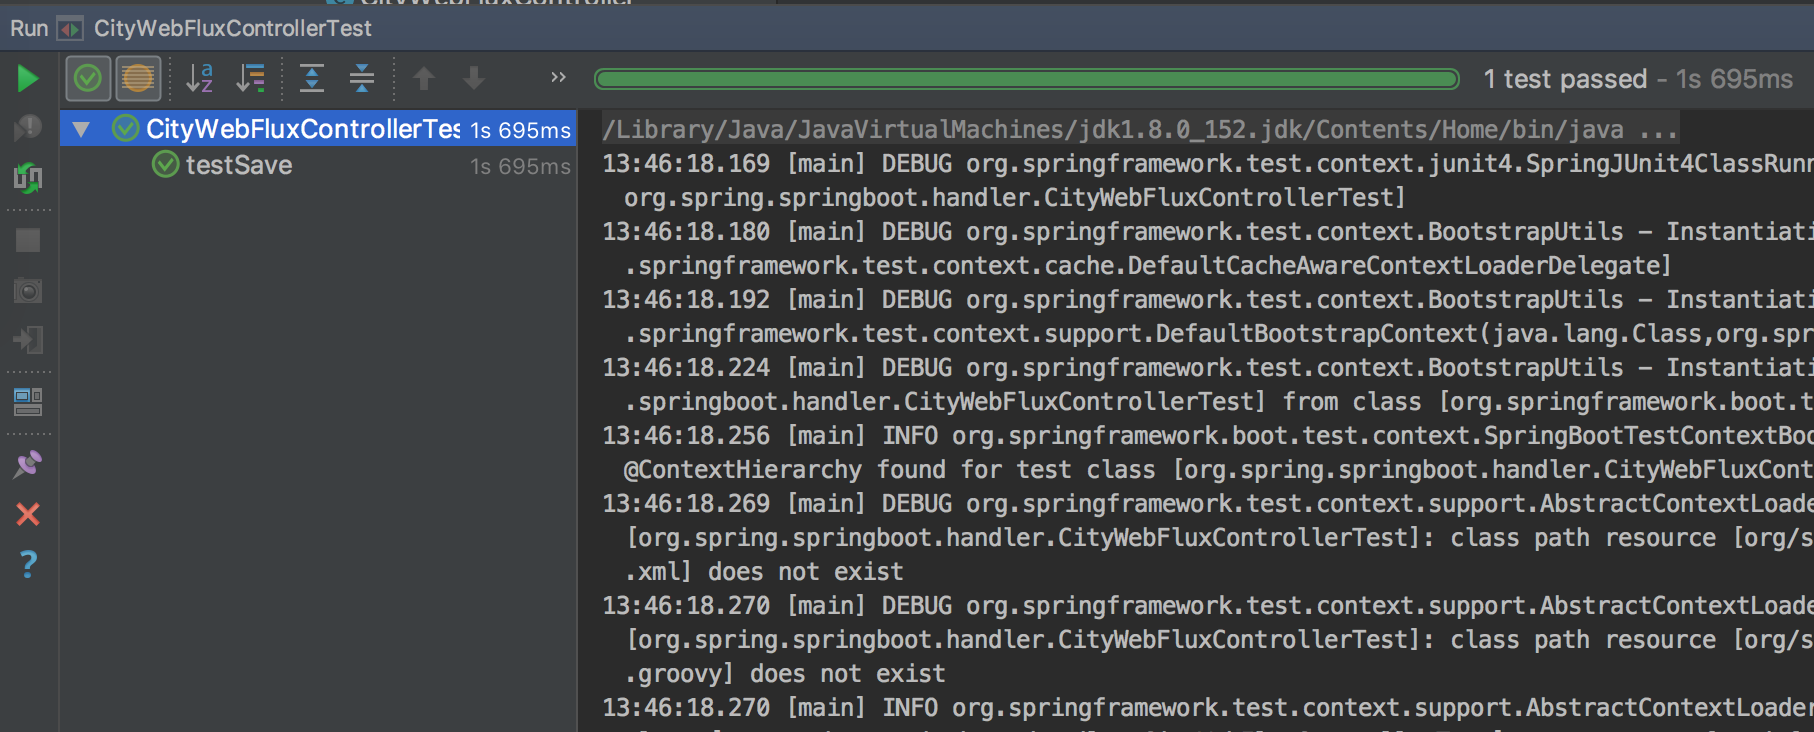
运行 Test,得到如图验证结果:
工程运行方式
了解工程服务器部署,先了解工程如何运行。
上面使用应用启动类运行工程,这是其中一种工程运行方式。Spring Boot 应用的运行方式很简单,下面介绍下这三种运行方式。
1. 使用应用启动类
在 IDEA 中直接执行应用启动类,来运行 Spring Boot 应用,日常开发中,会经常使用这种方式启动应用。常用的会有 Debug 启动模式,方便在开发中进行代码调试和 bug 处理。自然,Debug 启动模式会比正常模式稍微慢一些。
2. 使用 Maven 运行
通过 Maven 运行,需要配置 Spring Boot Maven 插件,在 pom.xml 配置文件中,新增 build 节点并配置插件 spring-boot-maven-plugin,代码如下:
在工程根目录中,运行如下 Maven 命令来运行 Spring Boot 应用:
mvn spring-boot:run
实际调用的是 pom.xml 配置的 Spring Boot Maven 插件 spring-boot-maven-plugin,上面执行了插件提供的 run 指令。也可以在 IDEA 右侧工具栏的 Maven Project Tab 中,找到 Maven 插件的 spring-boot-maven-plugin,执行相应的指令。所有指令如下:
/# 生成构建信息文件 spring-boot:build-info /# 帮助信息 spring-boot:help /# 重新打包 spring-boot:repackage /# 运行工程 spring-boot:run /# 将工程集成到集成测试阶段,进行工程的声明周期管理 spring-boot:start spring-boot:stop
3. 使用 Java 命令运行
使用 Maven 或者 Gradle 安装工程,生成可执行的工程 jar 后,运行如下 Java 命令来运行 Spring Boot 应用: java -jar target/xxx.jar
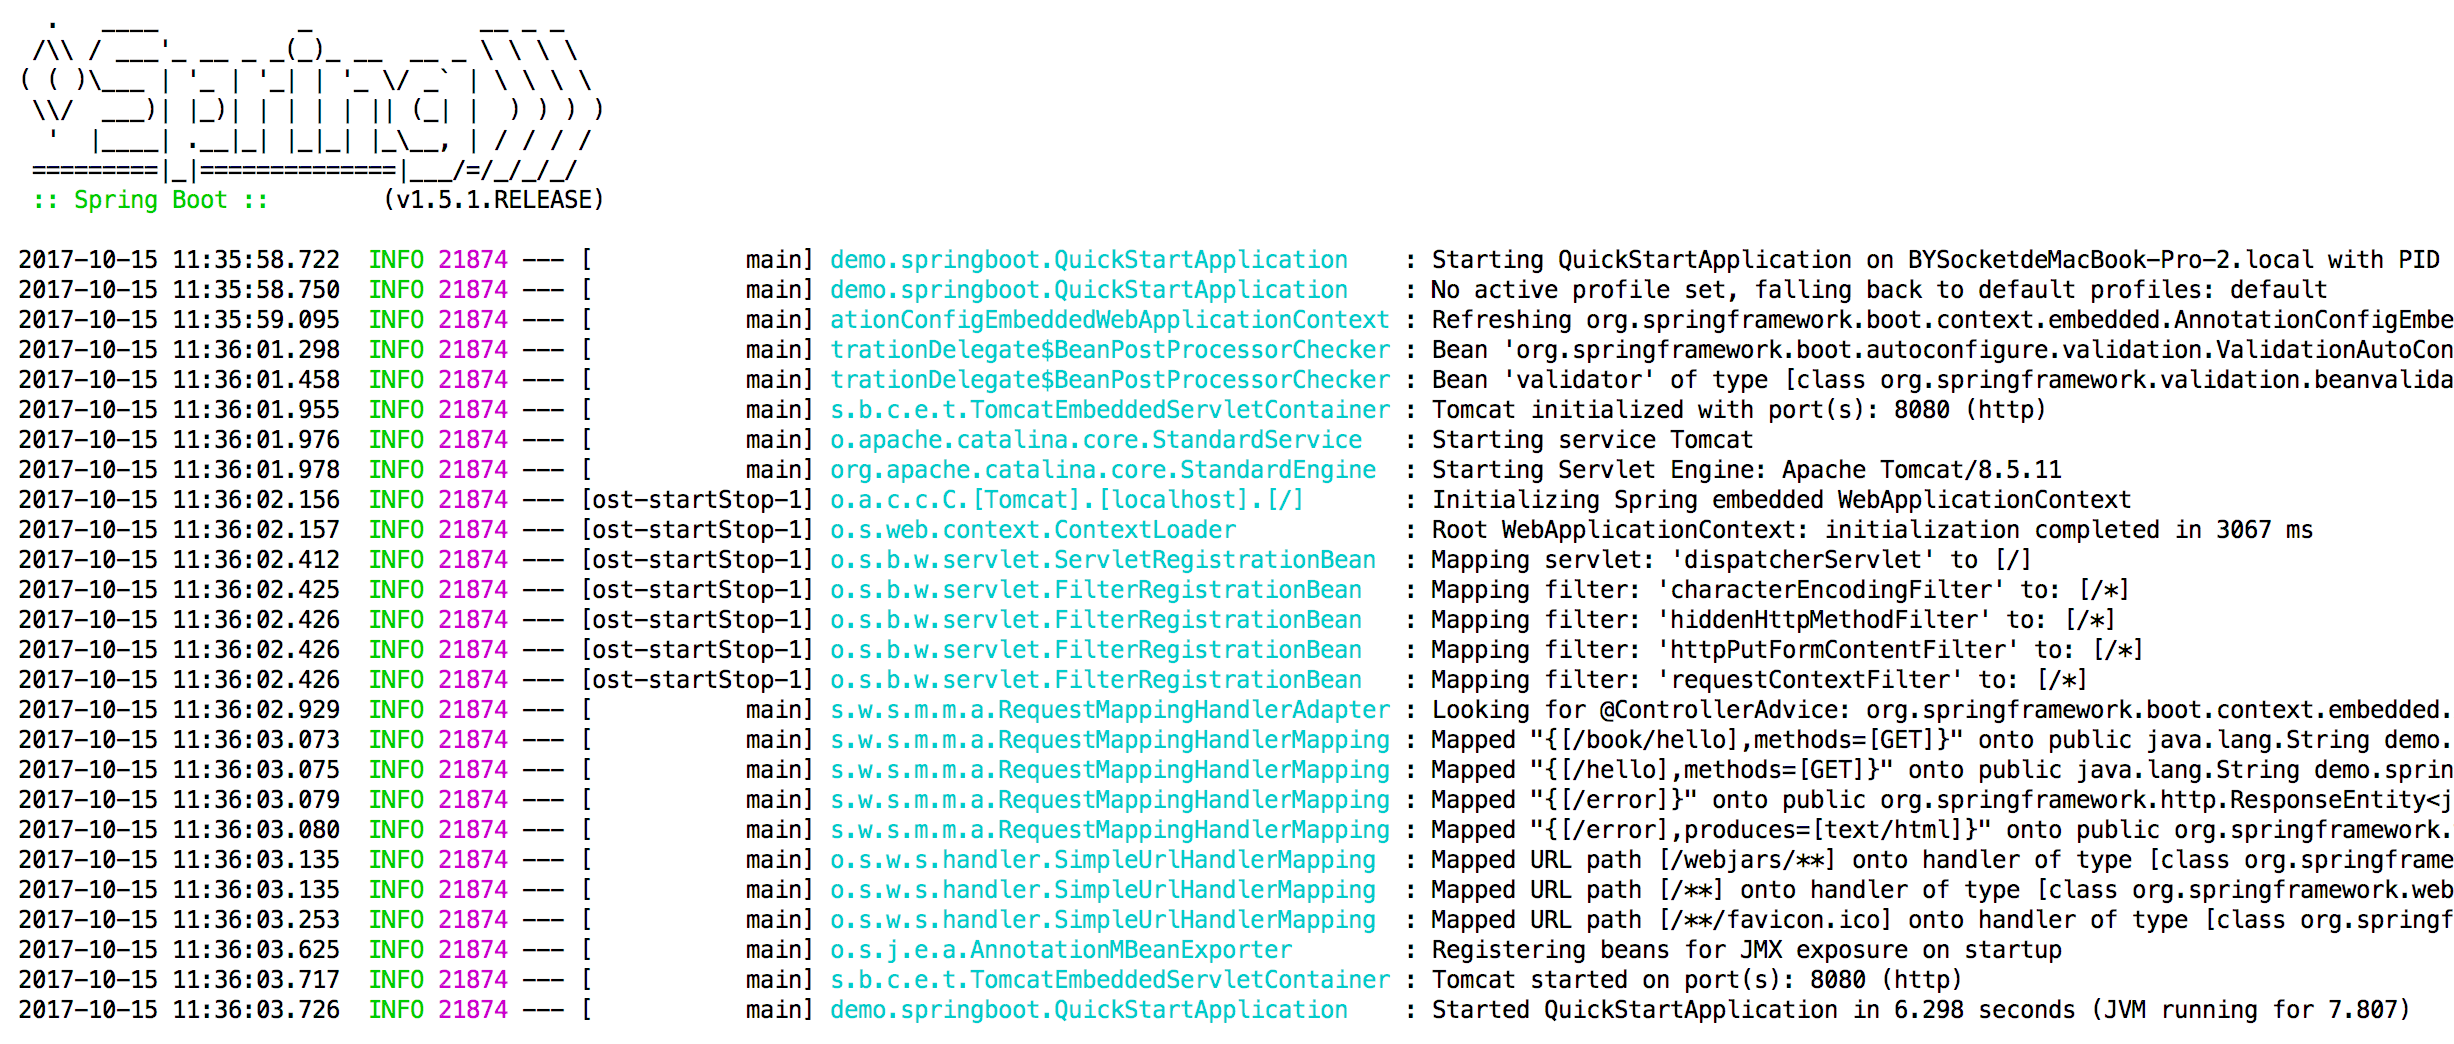
这里运行了 spring-boot-maven-plugin 插件编译出来的可执行 jar 文件。通过上述三种方式都可以成功运行 Spring Boot 工程,成功运行输出的控制台信息如图 1-10 所示。
工程服务器部署
基础环境安装如上面说的,需要 JDK 环境、Maven 环境等。
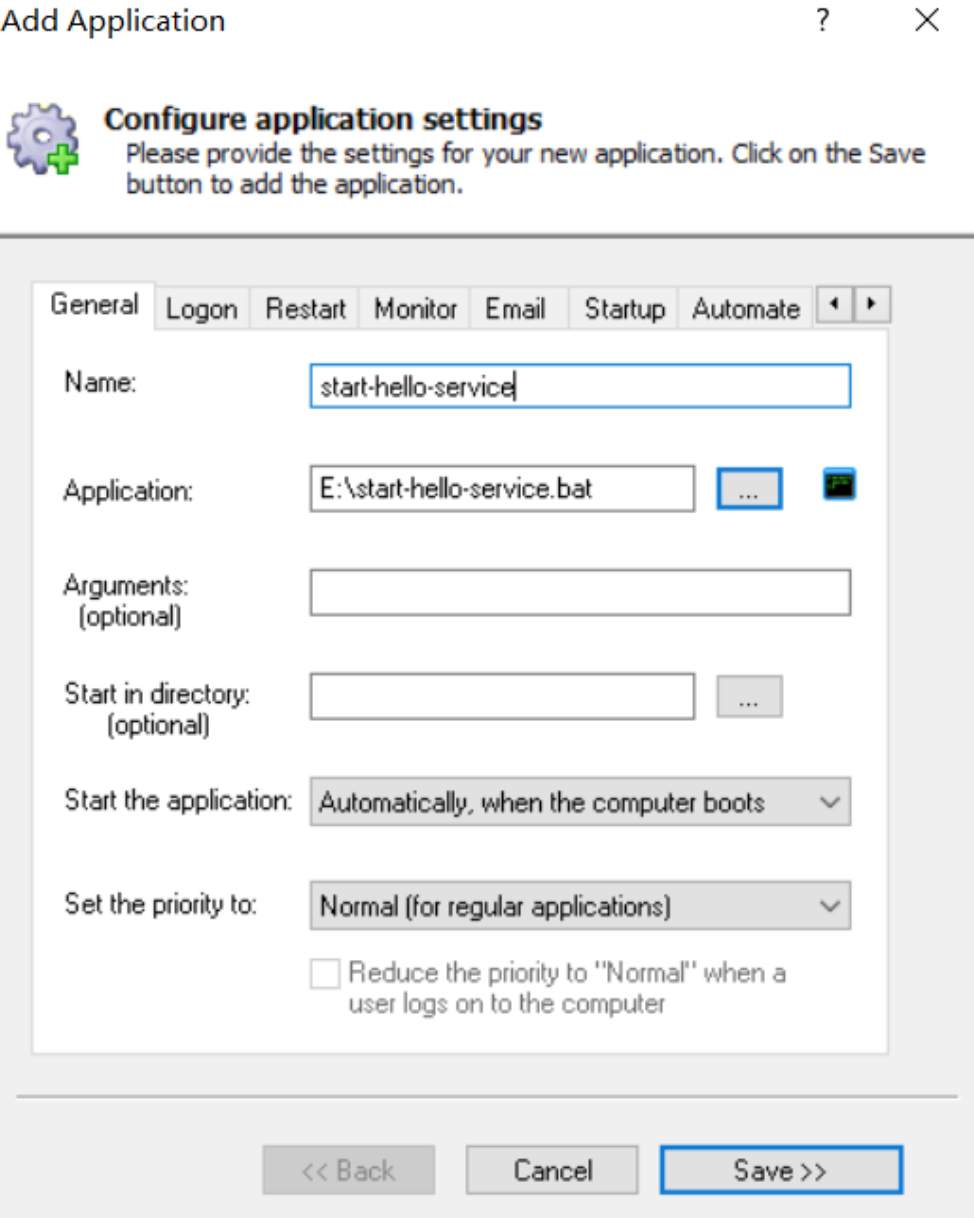
Win 服务器
推荐使用 AlwaysUp:
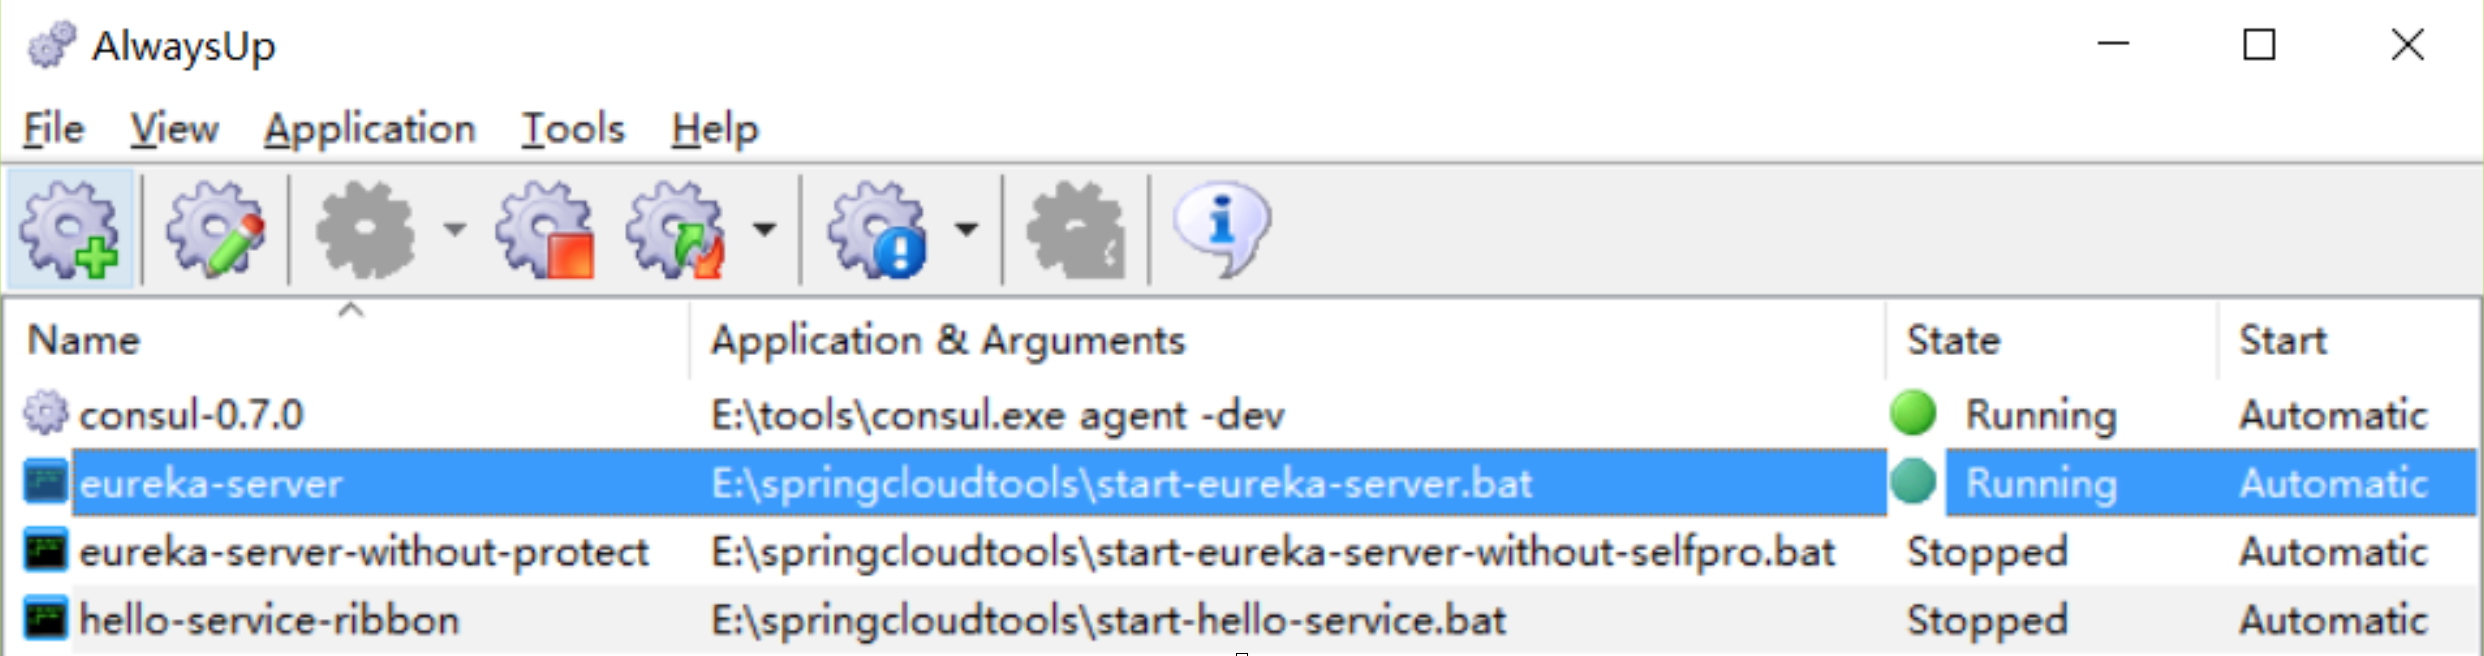
使用方式也很简单:
Linux 服务器
推荐 yum 安装基础环境,比如安装 JDK: yum -y list java/* yum -y install java-1.8.0-openjdk/* java -version
安装 Maven:
yum -y list apache-maven sudo wget http://repos.fedorapeople.org/repos/dchen/apache-maven/epel-apache-maven.repo -O /etc/yum.repos.d/epel-apache-maven.repo sudo yum install -y apache-maven mvn –v
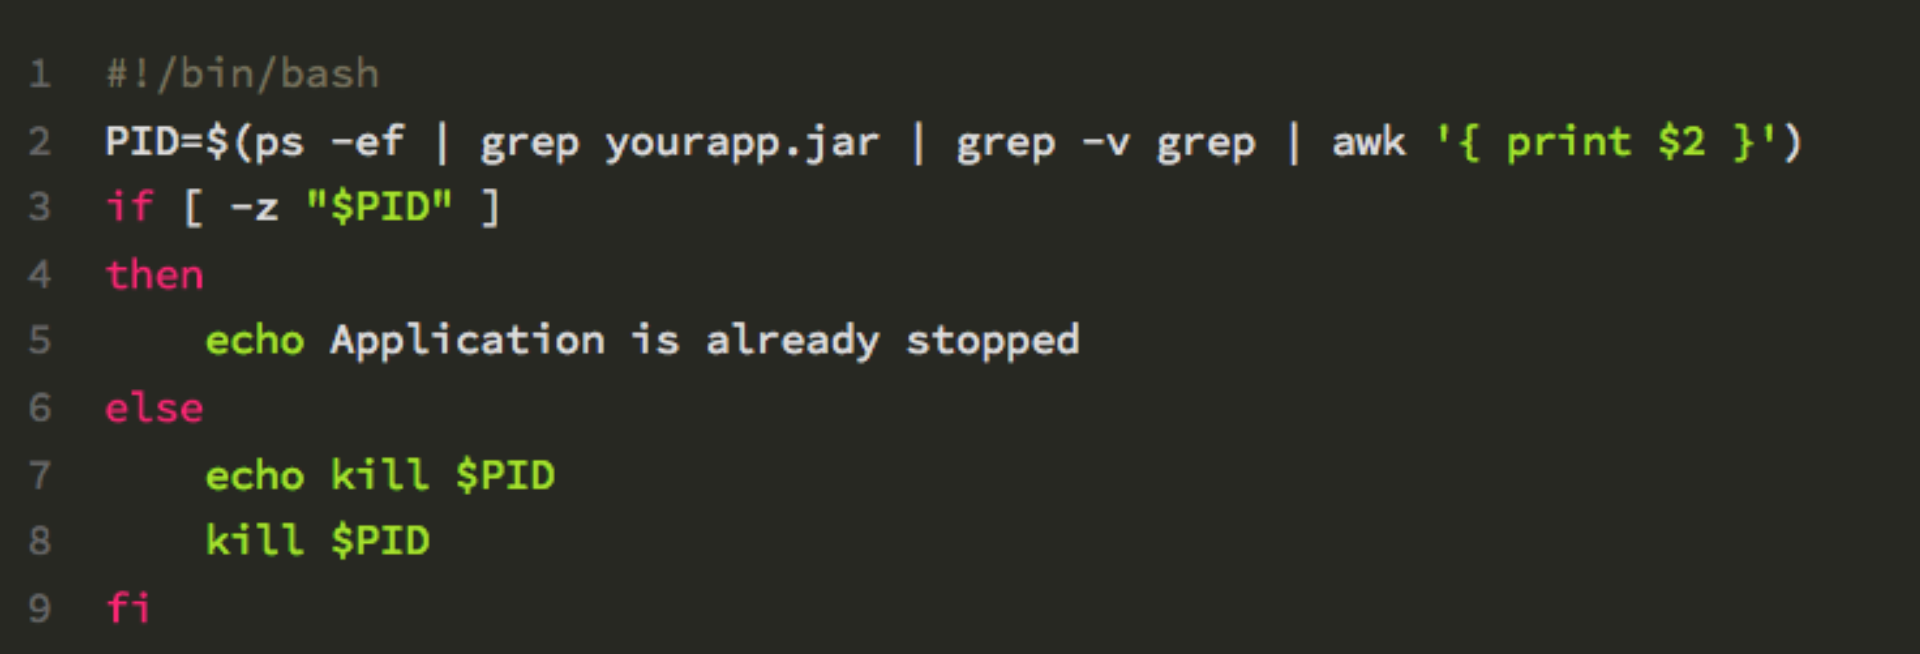
Linux 使用 nohup 命令进行对后台程序的启动关闭。
关闭应用的脚本:stop.sh
启动应用的脚本:start.sh

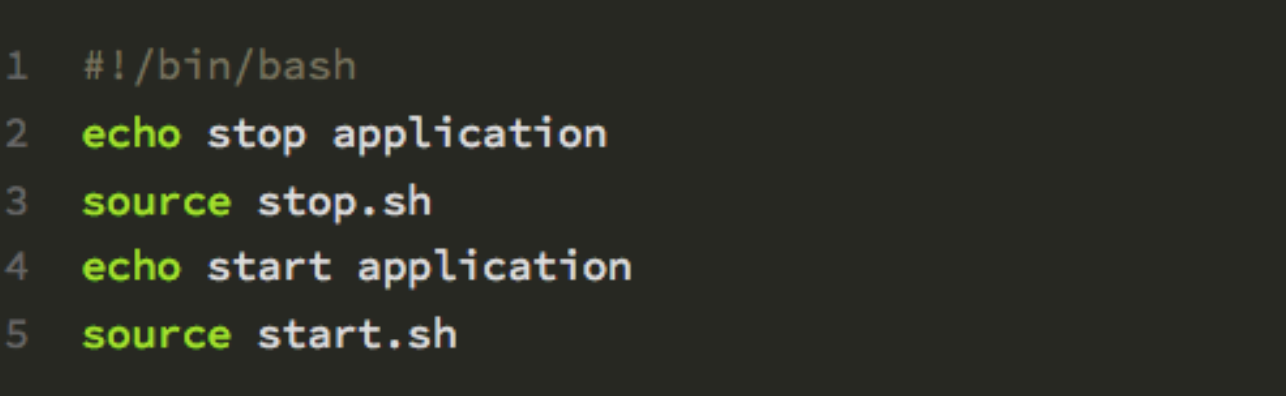
重启应用的脚本:stop.sh
总结
这一篇主要一起实践了简单的 WebFlux API 控制层的测试,Service 测试 Mock 和以前一样,以及工程运行、服务器部署的操作。
工程:springboot-webflux-9-test。
参考资料
https://learn.lianglianglee.com/%e4%b8%93%e6%a0%8f/%e6%a1%88%e4%be%8b%e4%b8%8a%e6%89%8b%20Spring%20Boot%20WebFlux%ef%bc%88%e5%ae%8c%ef%bc%89/10%20WebFlux%20%e9%9b%86%e6%88%90%e6%b5%8b%e8%af%95%e5%8f%8a%e9%83%a8%e7%bd%b2.md
更多学习
更多实时资讯,前沿技术,生活趣事。尽在【老马啸西风】
交流社群:[交流群信息](https://mp.weixin.qq.com/s/rkSvXxiiLGjl3S-ZOZCr0Q)
